

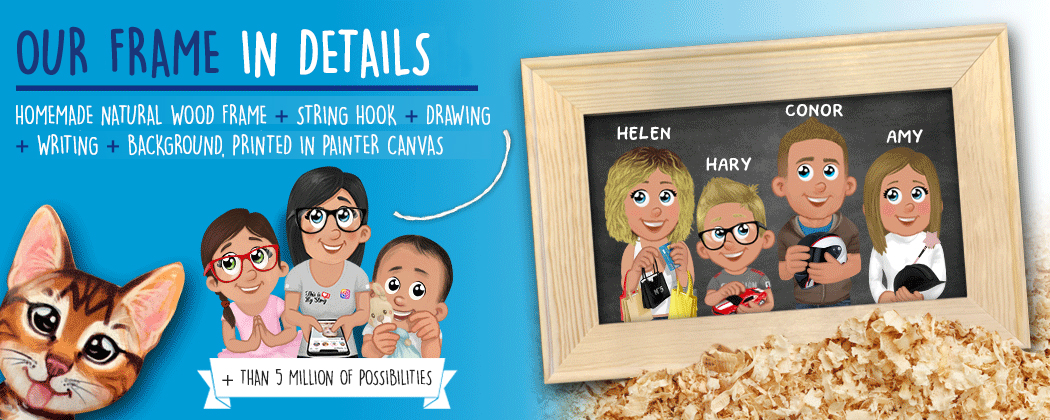
An ultra personalized gift idea!
How to do a portrait?
To make a frame, you need to go to the "CREATE A PORTRAIT" page.
This page is made up of 3 parts :
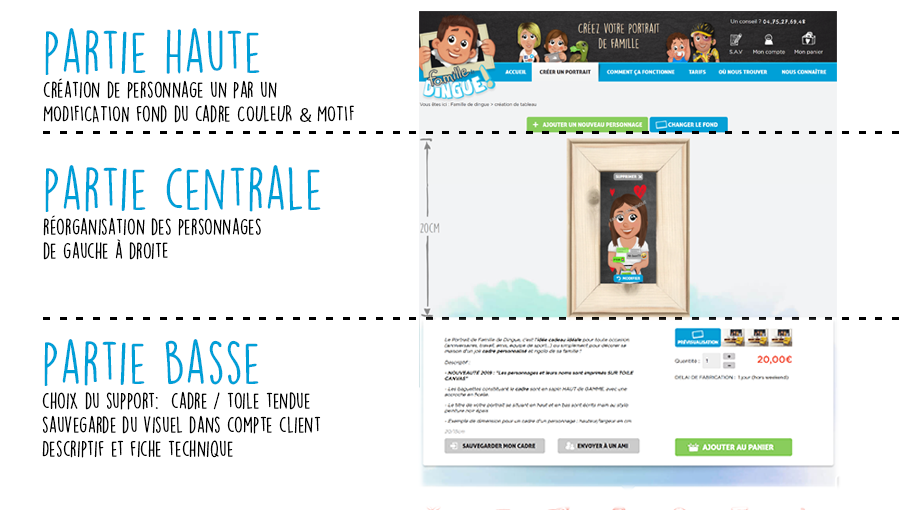
1. UPPER PART
I create my characters
Let’s have an example, my character is a mummy :
- I write her name or nickname : Mum, ma, etc...
- I choose the gender : not the toughest part on this one !
- I select the age – "Parents" in this case
- The skin color, the face shape, eyes colour, glasses or not.
- Even if mothers love to change their hairstyles, select the hair colour.
- Only one thing left to do: select on the right, the body and the face of your character (except for babies and pets). We’ve made available for you, Mojito enthusiasts, shopaholic mothers, crazy about rosé or completely hooked to their phones. The choice is yours !
But you know what the tougher part is? Make a choice. You can’t set your character with a rosé glass in one hand while doing shopping and sending texts with the remaining hand.
Once you’ve made your choice, you have to press :

We’ve helped you setting up the first character, you know what you’ve got to do now !
Choosing the scenery
To change the background, you have to press :
![]()
Then you can parade across the possibilities and select the colour or pattern you want.
2. MIDDLE PART
Reorganise the characters
When there is more than one character on my frame, I can change the order from left to right. To realise that, what I have to do is click on the character and move the character where I expect it to be.
With the setting button placed over and under each character, you can delete the character or amend its appearance.
Every time you add a character, the width of the frame will be automatically extended.
3. LOWER PART
Choosing my STAND
- I’ve got the choice between a wood frame or in a bigger way, a canvas on chassis.
- The dimensions are directly indicated in centimetres.
The preview will be automatically updated.


